Build an End-to-End ML Application
Learn how to develop a highly scalable and maintanable ML application from ideation to production with MLOps best practices.
All you need is a personal computer.
Overview
Have you ever wondered what it takes to build a full-stack ML application? Look no further as this article will walk you through
the development of an ML driven app for a text classification task using an open source LLM. However, you can apply
the techniques used in this guide to your own use case like NLP, CV, TTS, STT, Image Classification, etc.
In this guide, we will learn:
- Product and System Design, so we match our business need to the best ML approach.
- Data Processing, including preparation, exploration, and distribution of data for our use case.
- Model Development, from choosing the right model to training, tuning, evaluating and serving it on your computer.
- Scripting so we can have the system ready for production.
- Documentation to ensure easy maintenance and reproducibility of the source code.
- Testing, so all the elements in the source code meet established criteria before updates.
- Versioning, so our code, data, and models are reproducible.
- Containerization, so we can deploy and scale our ML app on prem or on any cloud service provider like AWS, GCP, or Azure.
- Deployment in Production for our model to be available to the outside world-wide-web.
- Monitoring, so we know if, when, how well, and how much our model is being used.
Access this project's GitHub repository for your reference.
This guide is inspired on the course Made with ML with some edits and adaptations made
for deploying the model on cloud service providers and on-prem clusters.
Before we begin...
Try the end product yourself!
Input the title of a paper or an article in the Machine Learning domain and a short description of it such as an abstract or introduction. The model will predict the branch of Machine Learning that your article is about.
Getting Started
We will first explore the business problem and ideate a potential solution, then we discuss what and why ML systems fit our product, and finally we setup the development environment in our computer. This includes a local machine and public cloud implementation using Azure VMs.
Product and System Design
In order to make a product that solves a problem for our users, we need to answer a set of questions that help us discover the painpoints and needs of our users.
Local Machine
We start with our computer, with its available resources (CPU and GPU) as a cluster.
Setup the local enivironment
To setup the project on your computer, start by:
- Fork(ing) the following repository using your Github account: https://github.com/YChuraRuiz/MLOps_MwML
-
Using the terminal, install pyenv on your computer with the following commands:
pyenv install 3.10.11 #install pyenv global 3.10.11 #set default version python3 --version #ensure you are using python 3.10.11; otherwise, restart the terminal. -
Create a new directory on your computer to clone the repository:
mkdir mlops cd mlops -
Inside the empty mlops directory, clone the your forked repository:
git clone https://github.com/YOUR_GITHUB_USERNAME/MLOps_MwML.git #change GITHUB_USERNAME with your actual github username git checkout -b dev #go to the dev branch of your cloned repo -
Create a file with your github credentials and connect to your repo:
touch .env vi .env #Inside .env add the following: GITHUB_USERNAME="YOUR_USERNAME" #Change with your actual github username, and save and exit the vi editor with ":wq + enter" source .env echo $GITHUB_USERNAME #Check your username is correct -
Create a virtual environment and upgrade setup tools. Define the cluster environment to install all dependencies and requirements. This will ensure that the version of all packages are consistent along the implementation:
export PYTHONPATH=$PYTHONPATH:$PWD
python3 -m venv venv2  # creates a new venv named venv2
source venv2/bin/activate  # on Windows: venv\Scripts\activate
python3 -m pip install --upgrade pip setuptools wheel # upgrades setup tools
python3 -m pip install -r requirements.txt # installs python packages
pre-commit install # sets up pre-commit hooks
pre-commit autoupdate # updates pre-commit hooks
Congrats! You're all set with the project contents. Now we move into the Jupyter Notebook to prep the data ingestion, model training, model evaluation, and model inference experiment.
Data Processing
In this section, we will prepare the data required for our model, we will perform some exploratory analysis, we will preprocess it to fit our model contraints, and we will distribute the processing for scalability.
Jupyter Notebook & Ray initialization
All machine learning workloads are defined and implemented in this jupyter notebook.
Start the notebook by running this command on your terminal:
jupyter lab notebooks/madewithml.ipynbOnce the notebook starts, run the following cells in the notebook before running the entire notebook.
-
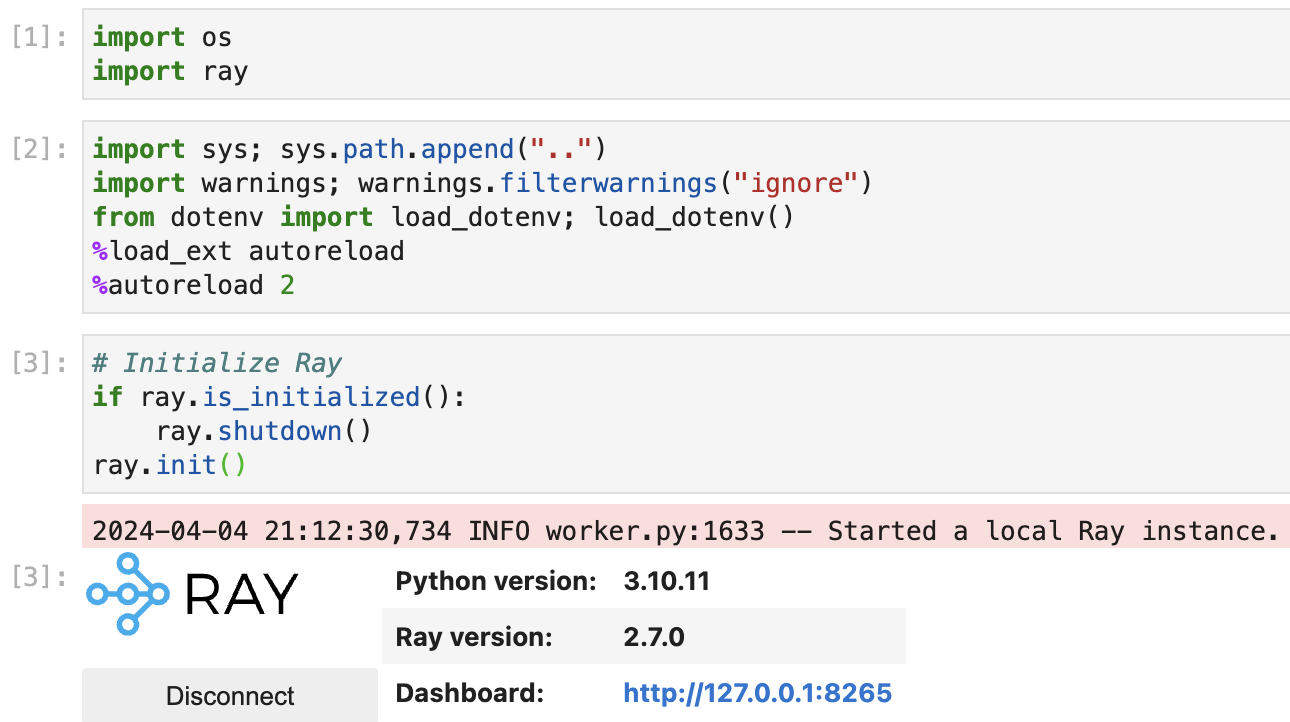
Cells [1]-[3]: Import and initialize Ray. Ray will provide the compute layer (distributed workloads) for parallel processing the neural nets in our experiment.

-
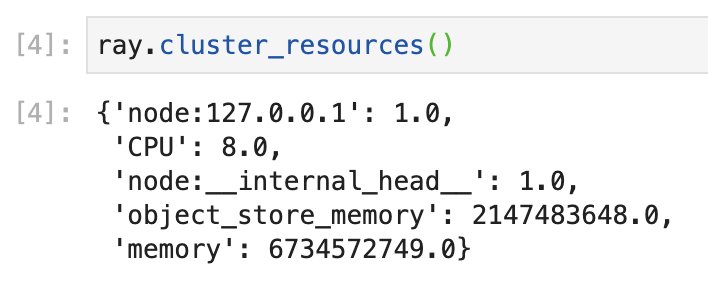
Cell [4]: Check the available cluster resources in your computer

-
Edit the number of workers and resources per worker according to your available resources
- It is safer to do a few less than total available CPU (1 for head node + 1 for background tasks)
- In my case: Total CPU = 8; allocated num_workers = 4. As you can see, I left 4 CPUs for laptop processes.
- Each resource will be allocated 1 CPU. And since my laptop does not have any GPUs, it is set to 0.

From here on, you can follow the notebook instructions and continue running the cells.
Model Developemnt
In this section, we will train our model, we will keep track of its performance, we will fine-tune it, we will evaluate the fined-tuned model, and finally we will serve the model locally and access it thorugh an API endpoint.
Machine Learning System Design

Our ML product is implemented and contained within the Jupyter Notebook.
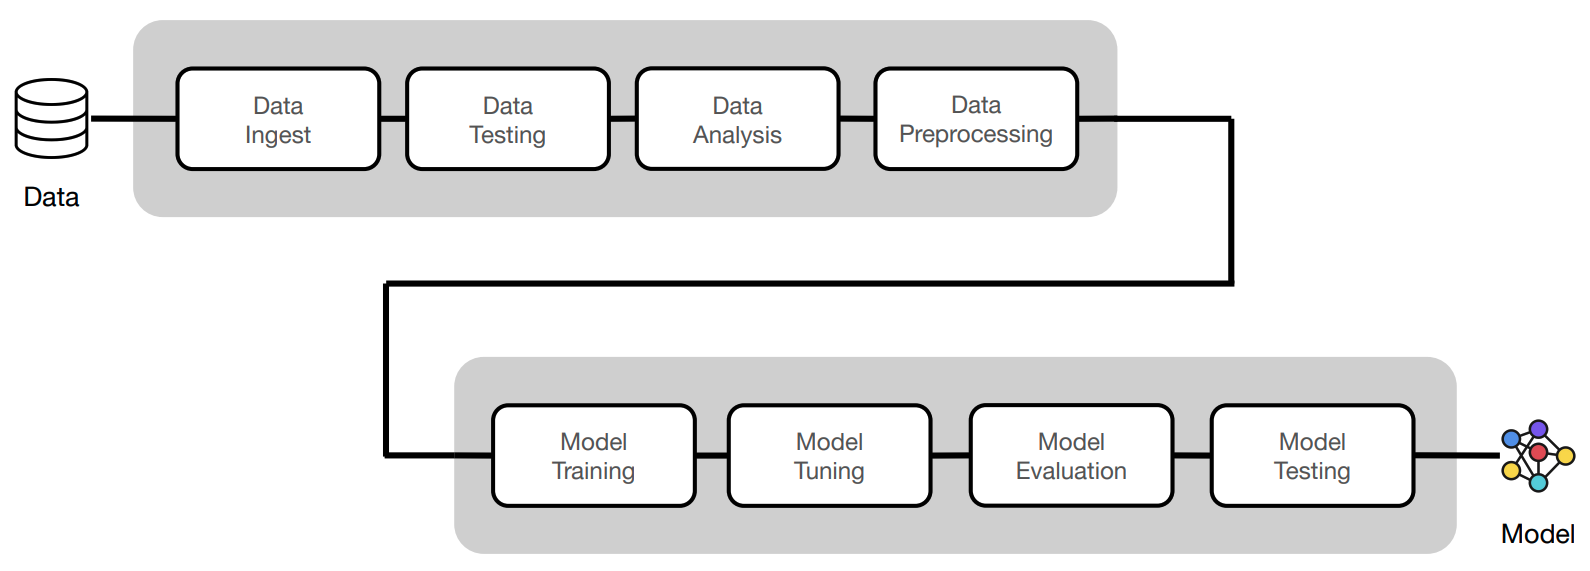
The ML system is composed of the following subsystems:
-
DATA:
- Ingestion, Testing, Analysis, and Preprocessing.
-
MODEL:
- Batching, Configurations, Training, Tuning, Inference, Evaluation, and Testing.
-
SERVING:
- Batch Inference and Online Inference.
Usage
Congratulations! You've designed, trained, and served a Machine Learning model from the Jupyter Notebook. You can now try some of the following methods to call the model and put it to work outside the Jupyter Notebook:
With the online server running from the jupyter notebook:
- Go to the ray Dashboard to see the model receiving requests and posting results: http://127.0.0.1:8265/
- The ML model is able to respond to any request sent to its host address: http://127.0.0.1:8000/ So we can use CURL or any other API tester to send requests to our model. Let's use CURL!
-
In a terminal window, run the following curl POST request:
curl -X POST http://127.0.0.1:8000/predict/ -H "Content-Type: application/json" -d '{"title": "Transfer learning with transformers", "description": "Using transformers for transfer learning on text classification tasks."}'
If you see the prediction, your ML model is up and running in your local machine and using HTML to receive requests!
For more detailed model and framework documentation, please refer to the MadewithML website or the Ray documentation
Scripting
We are ready to organize and prepare our Jupyter Notebook code into individual scripts for production.
Scripting ensures we have stateless runs of code, linear execution, and easier testing. To set up script files, it is advised to organize and choose names that relate to a specific workload. For example:
- config.py
- data.py
- evaluate.py
- models.py
- predict.py
- serve.py
- train.py
- tune.py
- utils.py
Each file contains functions that clearly represent their name. Also note that utilities (utils.py) includes shared components so that the core scripts do not fall into circular dependency conflicts.
Testing Scripts with CLI
We could run each function in our python files from our CLI manually to ensure they are executable; however, a better approach is to create our CLI using Typer. Read the Typer documentation here.
Explore train.py from our python files produced in the scripting section above and see how the Typer is implemented in the script as follows:
import typer
from typing_extensions import Annotated
app = typer.Typer()

@app.command()
def train_model(
    experiment_name: Annotated[str, typer.Option(help="name of the experiment.")] = None,
    ...):
    pass

if __name__ == "__main__":
    app()
To run the scripts with Typer:
-
Open a new terminal, source it with the virtual environment you used when installing all dependencies, and make sure python can find the modules in our project. In our case:
source venv2/bin/activate export PYTHONPATH=$PYTHONPATH:$PWD echo $PYTHONPATH #Should return current project directory -
Explore the required input parameters of our
train_modelfunction:python madewithml/train.py --help
Here we can see that our train.py workload requires some input parameters before running.
Training
Let's execute our train.py workload with inputs that resemble our local computer resources:
- experiment-name: environment variable set to the latest experiment (trained model) name
- dataset-loc: environment variable set to the cloud location of the dataset
- train-loop-config: rate of update of training parameters after each epoch
- num-workers: number of worker nodes to be allocated to the workload
- cpu-per-worker: number of CPUs in each worker node
- gpu-per-worker: number of GPUs in each worker node
- num-epochs: number of epochs for this training phase
- batch-size: number of bits per batch
- results-fp: path of the results file after training
export EXPERIMENT_NAME="llm"
export DATASET_LOC="https://raw.githubusercontent.com/GokuMohandas/Made-With-ML/main/datasets/dataset.csv"
export TRAIN_LOOP_CONFIG='{"dropout_p": 0.5, "lr": 1e-4, "lr_factor": 0.8, "lr_patience": 3}'
python madewithml/train.py \
    --experiment-name "$EXPERIMENT_NAME" \
    --dataset-loc "$DATASET_LOC" \
    --train-loop-config "$TRAIN_LOOP_CONFIG" \
    --num-workers 4 \
    --cpu-per-worker 1 \
    --gpu-per-worker 0 \
    --num-epochs 10 \
    --batch-size 256 \
    --results-fp results/training_results.json
Tuning
Model tuning is crucial for optimizing the performance of your model. Here are some tuning strategies you can apply:
- Learning Rate Tuning: Experiment with different learning rates to find an optimal value.
- Learning Rate Scheduler: Adjust the learning rate scheduler parameters to control how the learning rate changes during training.
- Dropout Probability: Explore different dropout probabilities to reduce overfitting and improve generalization.
- Model Architecture Changes: Experiment with changes in the model architecture.
- Batch Size Variation: Adjust the batch size to see its effect on training stability or convergence speed.
Further explorations might include:
- Regularization Techniques: Explore other regularization techniques to improve model robustness and generalization.
- Hyperparameter Search: Use automated hyperparameter search techniques to systematically explore a broader range of hyperparameter combinations.
export EXPERIMENT_NAME="llm"
export DATASET_LOC="https://raw.githubusercontent.com/GokuMohandas/Made-With-ML/main/datasets/dataset.csv"
export TRAIN_LOOP_CONFIG='{"dropout_p": 0.5, "lr": 1e-4, "lr_factor": 0.8, "lr_patience": 3}'
export INITIAL_PARAMS="[{\"train_loop_config\": $TRAIN_LOOP_CONFIG}]"
python madewithml/tune.py \
    --experiment-name "$EXPERIMENT_NAME" \
    --dataset-loc "$DATASET_LOC" \
    --initial-params "$INITIAL_PARAMS" \
    --num-runs 2 \
    --num-workers 4 \
    --cpu-per-worker 1 \
    --gpu-per-worker 0 \
    --num-epochs 10 \
    --batch-size 256 \
    --results-fp results/tuning_results.json
Experiment Tracking
Track your experiments with MLFlow. In a different terminal, run the following command:
export MODEL_REGISTRY=$(python -c "from madewithml import config; print(config.MODEL_REGISTRY)")
mlflow server -h 0.0.0.0 -p 8080 --backend-store-uri $MODEL_REGISTRY
Then go to http://localhost:8080/ to access the MLFlow dashboard.
Evaluation
Evaluate the model with the same scores used in the Jupyter notebook:
export EXPERIMENT_NAME="llm"
export RUN_ID=$(python madewithml/predict.py get-best-run-id --experiment-name $EXPERIMENT_NAME --metric val_loss --mode ASC)
export HOLDOUT_LOC="https://raw.githubusercontent.com/GokuMohandas/Made-With-ML/main/datasets/holdout.csv"
python madewithml/evaluate.py \
    --run-id $RUN_ID \
    --dataset-loc $HOLDOUT_LOC \
    --results-fp results/evaluation_results.json
Inference
Make a prediction with the model:
export EXPERIMENT_NAME="llm"
export RUN_ID=$(python madewithml/predict.py get-best-run-id --experiment-name $EXPERIMENT_NAME --metric val_loss --mode ASC)
python madewithml/predict.py predict \
    --run-id $RUN_ID \
    --title "Transfer learning with transformers" \
    --description "Using transformers for transfer learning on text classification tasks."
Serving
Start serving the model:
# Start the head of the dashboard
ray start --head
Monitor and debug Ray through its dashboard at http://127.0.0.1:8265.
# Set up
export EXPERIMENT_NAME="llm"
export RUN_ID=$(python madewithml/predict.py get-best-run-id --experiment-name $EXPERIMENT_NAME --metric val_loss --mode ASC)
python madewithml/serve.py --run_id $RUN_ID
Go to the Serve tab on Ray's Dashboard to check out the new service running.
Send a request to the server using Python or a CURL method:
curl -X POST http://127.0.0.1:8000/predict/ -H "Content-Type: application/json" -d '{"title": "Transfer learning with transformers", "description": "Using transformers for transfer learning on text classification tasks."}'Shut down the server:
ray stopTesting
Run the testing environment using the pytest framework:
# Code
python3 -m pytest tests/code --verbose --disable-warnings
# Data
export DATASET_LOC="https://raw.githubusercontent.com/GokuMohandas/Made-With-ML/main/datasets/dataset.csv"
pytest --dataset-loc=$DATASET_LOC tests/data --verbose --disable-warnings# Model
export EXPERIMENT_NAME="llm"
export RUN_ID=$(python madewithml/predict.py get-best-run-id --experiment-name $EXPERIMENT_NAME --metric val_loss --mode ASC)
pytest --run-id=$RUN_ID tests/model --verbose --disable-warnings# Coverage
python3 -m pytest tests/code --cov madewithml --cov-report html --disable-warnings # html report
python3 -m pytest tests/code --cov madewithml --cov-report term --disable-warnings # terminal report
coverage report -m # Prints coverage report on terminalCheck the interactive HTML coverage report on htmlcov/index.html in a browser.
Utilities
Documentation
Check out the automatically generated documentation using mkdocs:
python3 -m mkdocs serveThis serves the docs at http://localhost:8000/.
Pre-commit
Use the pre-commit framework to automatically perform checks via hooks when committing changes:
# Run all hooks on all files
pre-commit run --all-files

# Run one hook on all files
pre-commit run  --all-files

# Run all hooks on a file
pre-commit run --files

# Run one hook on a file
pre-commit run  --files
By default, when using "git commit -m", all of the hooks in the .pre-commit-config.yaml file run on all files.
Production on Azure VM
To deploy the application into production, we need to be on a cloud VM or on-prem cluster. We will use Azure Cloud. Regardless of the cloud provider, the following steps will be almost identical.
Setup
Install Azure CLI and Python dependencies. If you're on a different machine, install Ray. Make sure to use the same version of Ray as the one used for development (Ray 2.7.0):
pip install -U "ray==2.7.0" azure-cli azure-core azure-identity azure-mgmt-networkAuthentication
Configure your credentials to use your cloud provider from the command line:
az login  # Login on browser
az account list  # Find subscription ID
az account set -s   # Replace <...> with your subscription ID
Cluster Environment
The cluster configuration is defined within a YAML file used by the Cluster Launcher to launch the head node and by the Autoscaler to launch worker nodes. Specify the cloud provider, cluster location, resource_group, subscription_id, etc., needed for launching the cluster computing and environment requirements.
Create an SSH key for the autoscaler to authenticate whenever new nodes are created:
ssh-keygen -t rsa -b 4096
# Choose a directory, or default. Set a passphrase or not. If you set a passphrase, you'll be prompted to enter it whenever Ray attempts to create new nodes.
VM with CPU only
For this configuration, we will use the Standard_D4s_v3 instance for our workloads as it has the most similar configuration to our development laptop. Check all the cluster configurations for this project in this YAML file.
Note: Check your Azure account CPU quotas to avoid interruptions.
To run the configuration YAML file and launch the Ray cluster:
ray up cpu-cluster-config.yamlVM with CPU and GPU
For this configuration, we will use Azure's NC4as-T4-v3 instance for our workloads. Check the FAQ.md to see the reasons why.
Storage
You'll need a cloud storage bucket to keep the model registry files after all training and evaluation executes. We use blob storage on Azure to upload and store results and logs.